This post was first published on my past employers blog here. I thank OneDigit AG for the permission to publish my article also here.
Especially in this time of COVID-19 caused lockdowns, working from home is widespread. Therefore, working together on a developing VM in the cloud may be an attractive solution. In the past few months, I developed a solution to use VMs for such business cases. We also had in our minds that this VM could be a showcase for customers that prefer having their solution on their premises without Azure. Therefore, a VM in Azure in a Infrastructure-as-a-Service (IaaS) solution can make a lot of sense. This can also be a cost-efficient solution for those who want to try out things for a couple of hours. Even if you need this VM for a longer time, the costs are fairly limited, depending on the hardware specifications you are choosing.
The following article is split in three parts. In the first part, a script sets up a VM from scratch. The second walks you through the code and will setup Azure Bastion. And the last part will walk you through the installation of some software including Azure Data Studio via Chocolatey and the restore of a sample database with dbatools.
The full setup takes a bit more than 1 hour and is set up almost completely automatically.
Pre-requisites
Editor and connection to Azure I am using Visual Studio Code with some extensions for Azure. In order to connect to your Azure Account, you need to connect your editor of your choice with Connect-AzAccount.
Files in Azure File Store
You will need to upload a backup file to your file Azure File Store. Azure File Store is a quite cheap storage for storing files like database backups. To upload a backup file, I recommend using Azure Storage Explorer with which you can upload your files in a very convenient and secure way.
Azure Bastion
Azure Bastion will be set up this script automatically. However, I at this point, want to give you some resources first why and when you should use Azure Bastion. If you’re using a VM via Internet, it is always a bad idea to use a RDP connection without an encrypted tunnel.
https://docs.microsoft.com/en-us/azure/bastion/bastion-overview https://jussiroine.com/2019/09/building-a-secure-remote-access-solution-using-azure-bastion-host/
dbatools
We are going to install dbatools on the VM after its deployment. At this point, you don’t need to know much about this awesome collection of PowerShell commandlets. It contains 500+ easy and efficient to use scripts that are free and open source.
Chocolatey
We will also install Chocolatey on the VM. Again, at this point, you don’t really need to know much about it as we will just install some software with Chocolatey. It enables you to automatize, download and install many software with few lines of code, making it very quickly for anybody who has to set up a VM (or computers) from scratch. There is also a paid service by Chocolatey, but we will be using the free service offer.
Lets start with the script
As an overview the following script does the following tasks:
- Creates the VM with SQL Server
- Creates Azure Bastion
Following you’ll see the entire script and after this script in the second part of this article, I’ll walk you through it.
# Variables
## Global Settings
$Location = "switzerlandnorth"
$ResourceGroupName = "bloglab"
## Settings for Storage
$StorageName = $ResourceGroupName + "storage"
$StorageSku = "Standard_LRS"
## Settings for Network
$InterfaceName = $ResourceGroupName + "ServerInterface"
$NsgName = $ResourceGroupName + "nsg"
$VNetName = $ResourceGroupName + "VNet"
$SubnetName = "Default"
$VNetAddressPrefix = "10.0.0.0/16"
$VNetSubnetAddressPrefix = "10.0.0.0/24"
$TCPIPAllocationMethod = "Dynamic"
$DomainName = $ResourceGroupName
## Settings for Bastion
$publicIpName = "pip" + $ResourceGroupName
$BastionName = "Bastion" + $ResourceGroupName
$BastionSubnetName = "AzureBastionSubnet"
## Settings for hardware
$VMName = $ResourceGroupName + "VM"
$ComputerName = $ResourceGroupName + "Server"
$VMSize = "Standard_D4s_v3"
$OSDiskName = $VMName + "OSDisk"
## Settings for SQL Server licence
$PublisherName = "MicrosoftSQLServer"
$OfferName = "sql2019-ws2019"
$Sku = "SQLDEV"
$Version = "latest"
# Set credentials for logging into VM
$Credential = Get-Credential -Message "Type the name and password of the local administrator account."
# Creation of Objects
## Resource Group
New-AzResourceGroup -Name $ResourceGroupName -Location $Location
## Storage
$StorageAccount = New-AzStorageAccount -ResourceGroupName $ResourceGroupName -Name $StorageName -SkuName $StorageSku -Kind "Storage" -Location $Location
## Network
$SubnetConfig = New-AzVirtualNetworkSubnetConfig -Name $SubnetName -AddressPrefix $VNetSubnetAddressPrefix
$VNet = New-AzVirtualNetwork -Name $VNetName -ResourceGroupName $ResourceGroupName -Location $Location -AddressPrefix $VNetAddressPrefix -Subnet $SubnetConfig
$PublicIp = New-AzPublicIpAddress -Name $InterfaceName -ResourceGroupName $ResourceGroupName -Location $Location -AllocationMethod $TCPIPAllocationMethod -DomainNameLabel $DomainName
$NsgRuleRDP = New-AzNetworkSecurityRuleConfig -Name "RDPRule" -Protocol Tcp -Direction Inbound -Priority 1000 -SourceAddressPrefix * -SourcePortRange * -DestinationAddressPrefix * -DestinationPortRange 3389 -Access Allow
$NsgRuleSQL = New-AzNetworkSecurityRuleConfig -Name "MSSQLRule" -Protocol Tcp -Direction Inbound -Priority 1001 -SourceAddressPrefix * -SourcePortRange * -DestinationAddressPrefix * -DestinationPortRange 1433 -Access Allow
$Nsg = New-AzNetworkSecurityGroup -ResourceGroupName $ResourceGroupName -Location $Location -Name $NsgName -SecurityRules $NsgRuleRDP, $NsgRuleSQL
$Interface = New-AzNetworkInterface -Name $InterfaceName -ResourceGroupName $ResourceGroupName -Location $Location -SubnetId $VNet.Subnets[0].Id -PublicIpAddressId $PublicIp.Id -NetworkSecurityGroupId $Nsg.Id
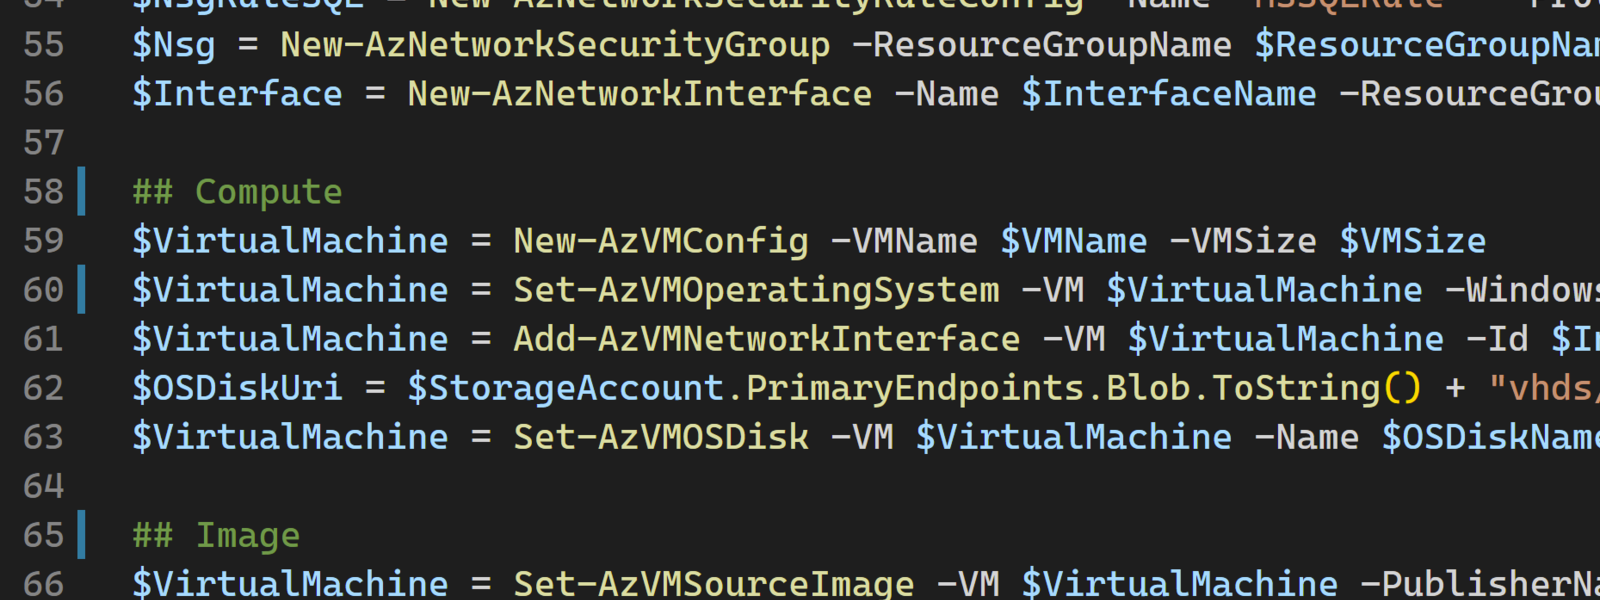
## Compute
$VirtualMachine = New-AzVMConfig -VMName $VMName -VMSize $VMSize
$VirtualMachine = Set-AzVMOperatingSystem -VM $VirtualMachine -Windows -ComputerName $ComputerName -Credential $Credential -ProvisionVMAgent -EnableAutoUpdate #-TimeZone = $TimeZone
$VirtualMachine = Add-AzVMNetworkInterface -VM $VirtualMachine -Id $Interface.Id
$OSDiskUri = $StorageAccount.PrimaryEndpoints.Blob.ToString() + "vhds/" + $OSDiskName + ".vhd"
$VirtualMachine = Set-AzVMOSDisk -VM $VirtualMachine -Name $OSDiskName -VhdUri $OSDiskUri -Caching ReadOnly -CreateOption FromImage
## Image
$VirtualMachine = Set-AzVMSourceImage -VM $VirtualMachine -PublisherName $PublisherName -Offer $OfferName -Skus $Sku -Version $Version
## Create the VM in Azure
New-AzVM -ResourceGroupName $ResourceGroupName -Location $Location -VM $VirtualMachine
## Add the SQL IaaS Extension with chosen license type
New-AzSqlVM -ResourceGroupName $ResourceGroupName -Name $VMName -Location $Location -LicenseType PAYG
## Create Azure Bastion Host
Add-AzVirtualNetworkSubnetConfig -VirtualNetwork $VNet -Name $BastionSubnetName -AddressPrefix 10.0.1.0/27
$VNet | Set-AzVirtualNetwork
$publicip = New-AzPublicIpAddress -ResourceGroupName $ResourceGroupName -name $publicIpName -location $Location -AllocationMethod Static -Sku Standard
New-AzBastion -ResourceGroupName $ResourceGroupName -Name $BastionName -PublicIpAddress $publicip -VirtualNetworkId $VNet.id
I will walk you through some major settings that the code above has so you may alter them accordingly to your needs.
$Location = "switzerlandnorth"
$ResourceGroupName = "bloglab"
Since I live and work in Greater Zurich Area, I’ve picked switzerlandnorth as my hosted location for Azure. If you want to pick a different one but don’t know your choices, you can get a list with Get-AzLocation.
$ResourceGroupName
Defines the name of your Resource Group. You can think of it as a container that holds all objects you’ve got within it. This makes configurations for your objects easier. For example, in order to copy or move your objects from “switzerlandnorth” (Zurich) to “switzerlandwest” (Geneva) would mean that you only need to address the container and every single object within this group.
$StorageSku = "Standard_LRS"
This defines what kind of storage you will use. For a better decision what choices you have, check its documentation. In our example, I’ve picked the standard type. Please note that there may be pricing variations amongst the different types which you may want to find out about here.
# Set credentials for logging into VM
$Credential = Get-Credential -Message "Type the name and password of the local administrator account."
Shortly after you start the script, you’ll notice that you need to enter some credentials. This is actually this line that cast this question. In order to access the VM, you need to pass exactly this credentials. In other words, during the creation of the VM, your initial credentials are set so you may access it.
## Settings for Network
Next, you’ll see some networking configurations. These configurations have to be made because you’ll have a virtual net around your virtual machine. You need it also for Azure Bastion which basically lets you access your VM via a secure tunnel via SSL. Your browser will provide the actual access. I’ll show you more about this later, but for now, it is sufficient to say that Azure Bastion makes it easy for you to tunnel your RDP connection. It is not exactly free but it allows you to create a secure RDP connection if you don’t have the means to create an own VPN tunnel. You can find out more about the pricing for Azure Bastion here.
## Settings for Bastion
$BastionAddressPrefix = "10.0.1.0/27"
In the settings for Azure Bastion, we define some names. I’ve used the pretty standard naming conventions that Microsoft suggests here. The last line in these settings is what I want to emphasize here. It is important to note that $BastionAddressPrefix needs to be at least /27 as Microsoft states in its documentation in the bullet point “Subnet” here. This can be a source of confusion if you don’t pay attention to this.
## Settings for hardware
With $VMSize = "Standard_D4s_v3"
$OSDiskName = $VMName + "OSDisk"
With this we define some VM specific “hardware”. Again, with what you decide to go for, the pricing may change. To find out more about this, Microsoft provides a calculator for pricing where you may get your estimates. Some more information about the right sizing for your VM provides Thomas Maurer, a Senior Cloud Advocate at Microsoft. If you want to list which options you have for your preferred location, you can use
Get-AzVMSize -Location "switzerlandnorth"
SQL Server License Since we actually want to have a SQL Server on the VM, we also need to decide what kind of licensing we want. In this installation, we are going to use. If you want to find out what options you have for your preferred location you can type:
## Settings for SQL Server licence
Get-AzVMImageOffer -Location switzerlandnorth -Publisher 'MicrosoftSQLServer'
For more information about the costs and licensing can be found on Microsofts documentation about Pricing guidance for SQL Server on Azure VMs.
So with the code we have so far, we now configured almost all variables. The rest of the code actually creates the needed objects.
If you run the code, you’ll notice that it’ll take about 5 minutes until it continues at some point. The creation of Azure Bastion host takes some while. After the code has completed, after about 20 minutes, you’ll have a fair amount of objects in your resource group, being the VM and the Bastion host amongst them.
I will show you how to set up the generated VM with a SQL Database and various software in an automated way.
Starting and setting up the VM
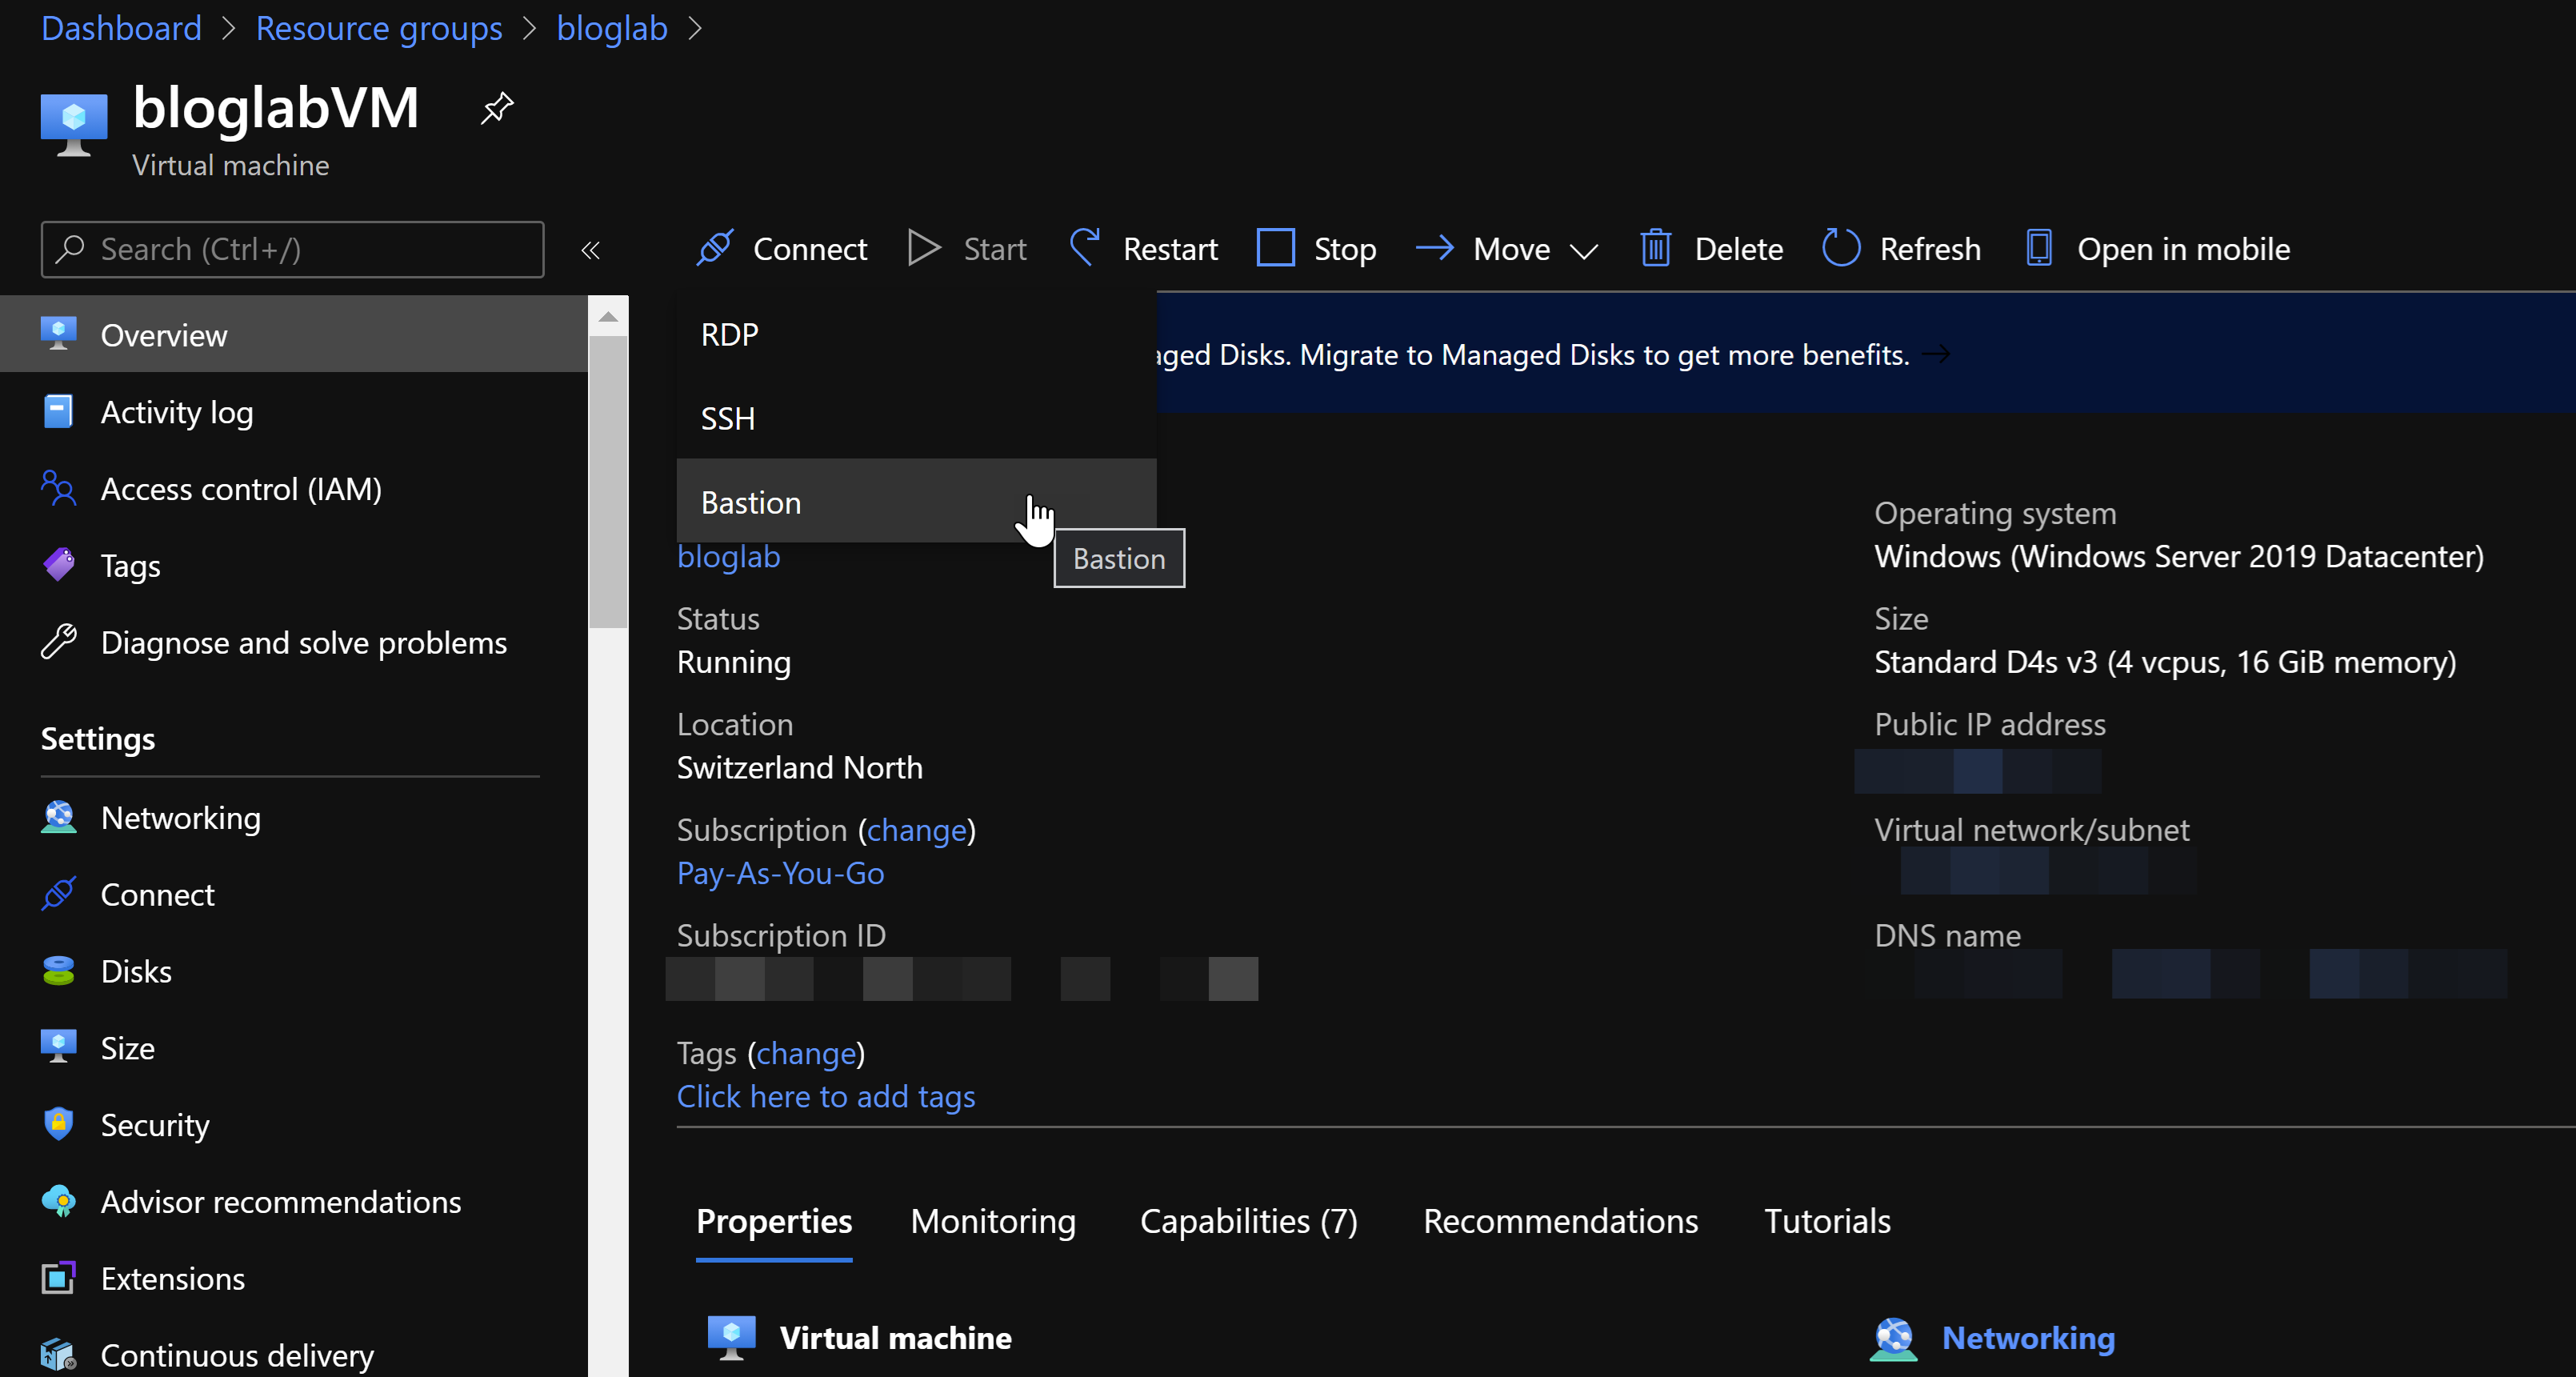
Now the VM is deployed and already started. Now is also the moment you’ve been waiting for – you want to access to your VM. In order to do so, go to your Azure portal and find your resource and your VM in there. Once you’re clicked on your VM, you’ll see a screen like below. Here, click on “Connect” as below and choose the option Bastion.
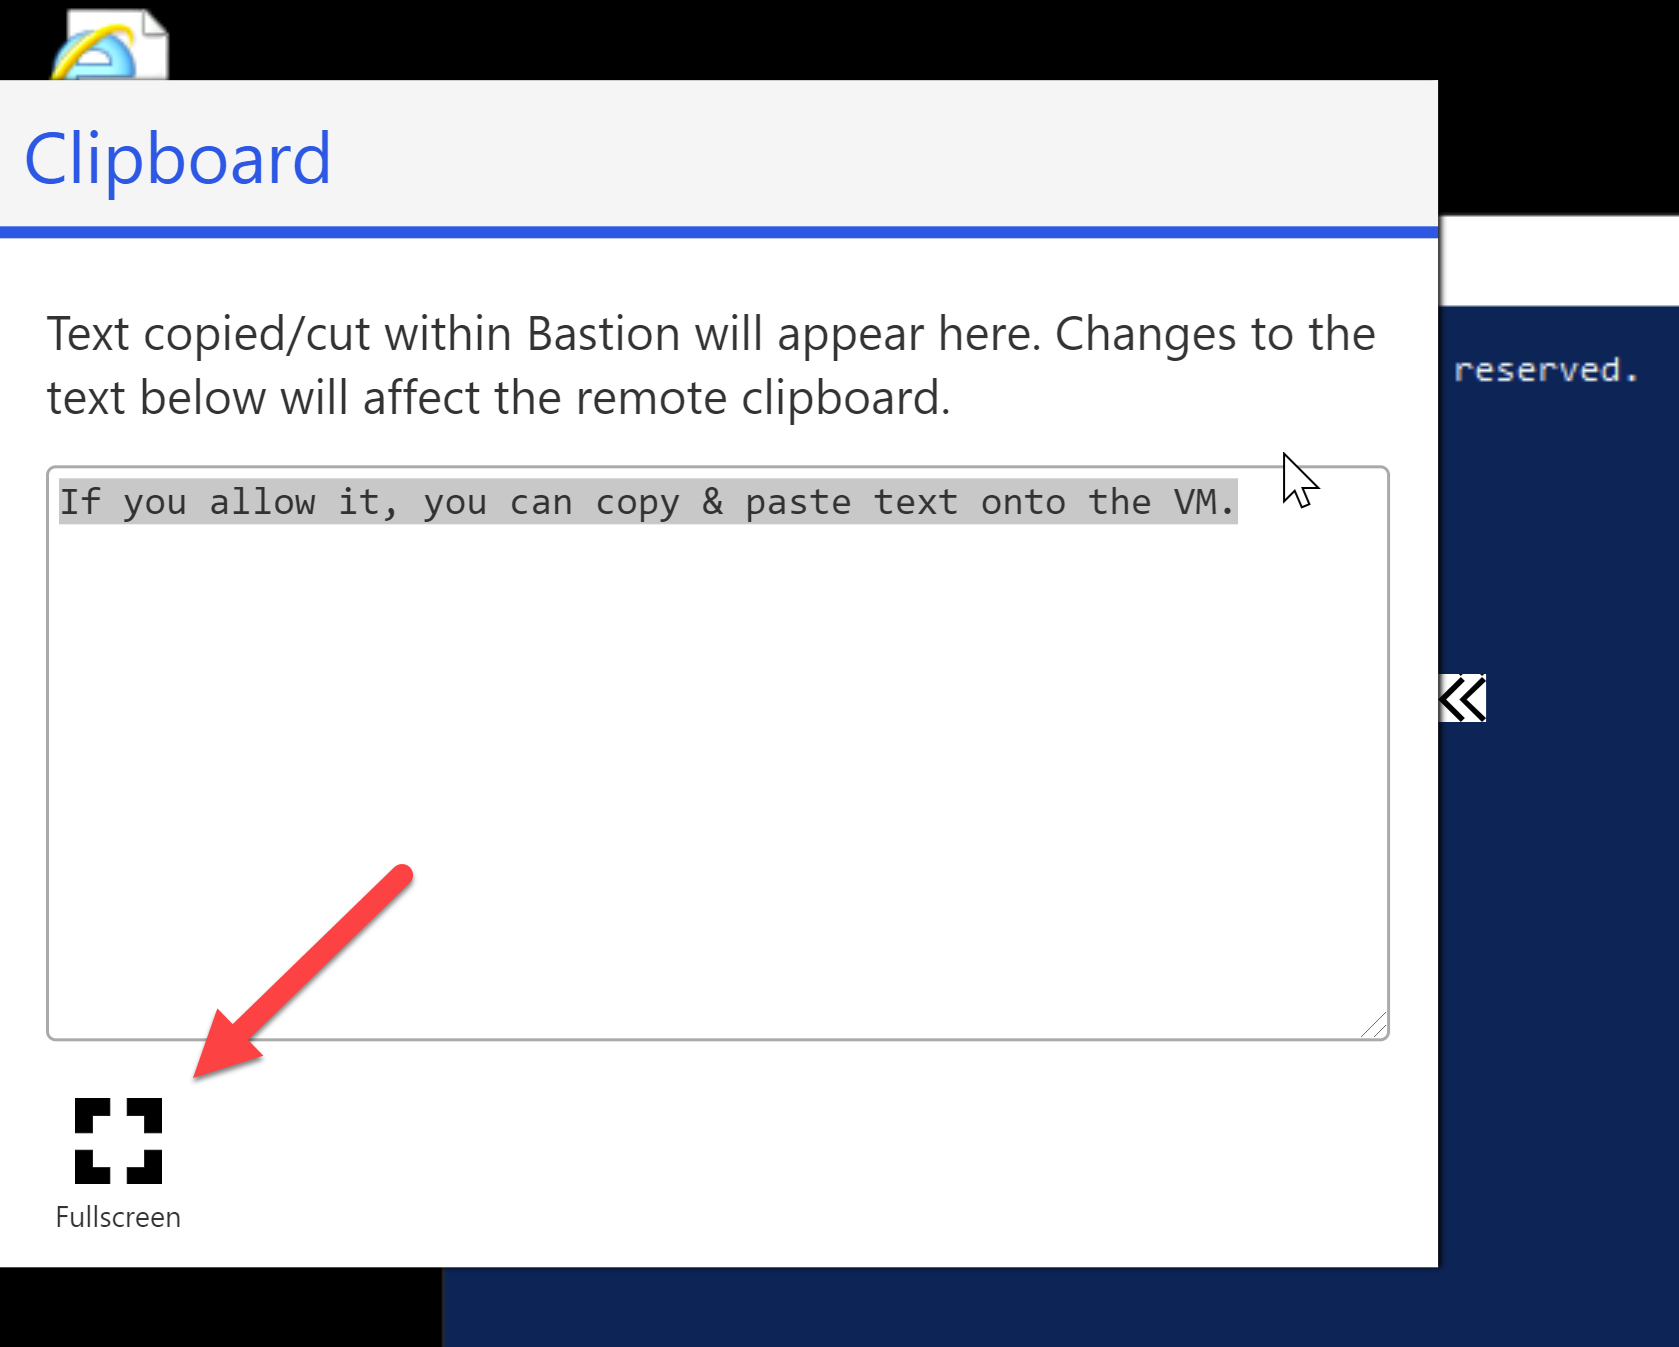
After this, you’ll see a site with a button “Use Bastion” on which you click. In the next window, you need to enter the credentials you’ve set for this VM during the running of the script. Your browser starts to connect to your VM. During that time, you will see a small window asking if you want to allow copy & paste. If you allow it, you can copy & paste text onto the VM. It is not possible to copy files into the VM on this way. However, like I’ve already mentioned in the prerequisites, you can use the Azure File Storage Explorer with which you can use drag and drop to upload files to this File Storage. You can map this storage as a network drive so you can access even larger files very conveniently that way. The next few steps will allow you do so.
After your VM started and you see Windows, you might want to have a full screen view on your VM. To do so, click on this » on the left side
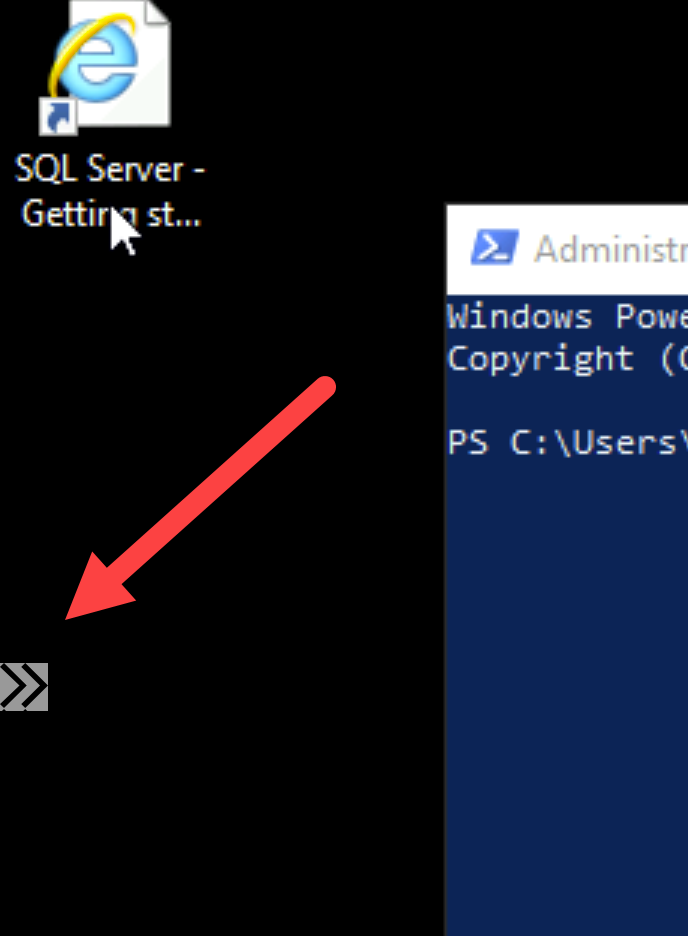
This will slide open a small window like this. In here, you can choose full screen:
And add a File Share:
# Enabling execution of PowerShell scripts:
set-executionpolicy remotesigned -Force

# Mounting Azure File Store as cheap data storage
$connectTestResult = Test-NetConnection -ComputerName $YourDataStorageName.file.core.windows.net -Port 445
if ($connectTestResult.TcpTestSucceeded) {
    # Save the password so the drive will persist on reboot
    cmd.exe /C "cmdkey /add:`"$YourDataStorageName.file.core.windows.net`" /user:`"Azure\sqlsrvbaks`" /pass:`"$YourPassword`""
    # Mount the drive
    New-PSDrive -Name Z -PSProvider FileSystem -Root "\\YourDataStorageName.file.core.windows.net\wideworldimporters" -Persist
}
else {
    Write-Error -Message "Unable to reach the Azure storage account via port 445. Check to make sure your organization or ISP is not blocking port 445, or use Azure P2S VPN, Azure S2S VPN, or Express Route to tunnel SMB traffic over a different port."
}
With this, we are now able to install chocolatey:
# Install Chocolatey:
Set-ExecutionPolicy Bypass -Scope Process -Force; [System.Net.ServicePointManager]::SecurityProtocol = [System.Net.ServicePointManager]::SecurityProtocol -bor 3072; iex ((New-Object System.Net.WebClient).DownloadString('https://chocolatey.org/install.ps1'))
Chocolatey makes it extremely easy to install a lot of software with just one PowerShell line as following:

# Install Chocolatey GUI and other software:
choco install chocolateygui microsoft-edge tabular-editor daxstudio azure-data-studio git dbatools vscode -y
This installs:
Of course, you could add / remove the software as you like in that line. The last -y means that you agree to the installs of all listed software. dbatools takes quite some time to be installed (ca. 10 minutes) so don’t be surprised if it seems to be stuck – it is not.
With this Tabular Editor, .Net Framework 4.8 gets installed. Therefore we need to reboot the VM:
# Rebooting Computer to complete installs
Restart-Computer
You just can keep the browser tab for the VM open until the reboot is done and you can continue.
With dbatools being installed, we would like to restore our databases. But, remember – we need to have the backup files first which we need to bring to our VM first? Now it is the time to map Azure File Store to our VM. If you go to Azure Portal, go to
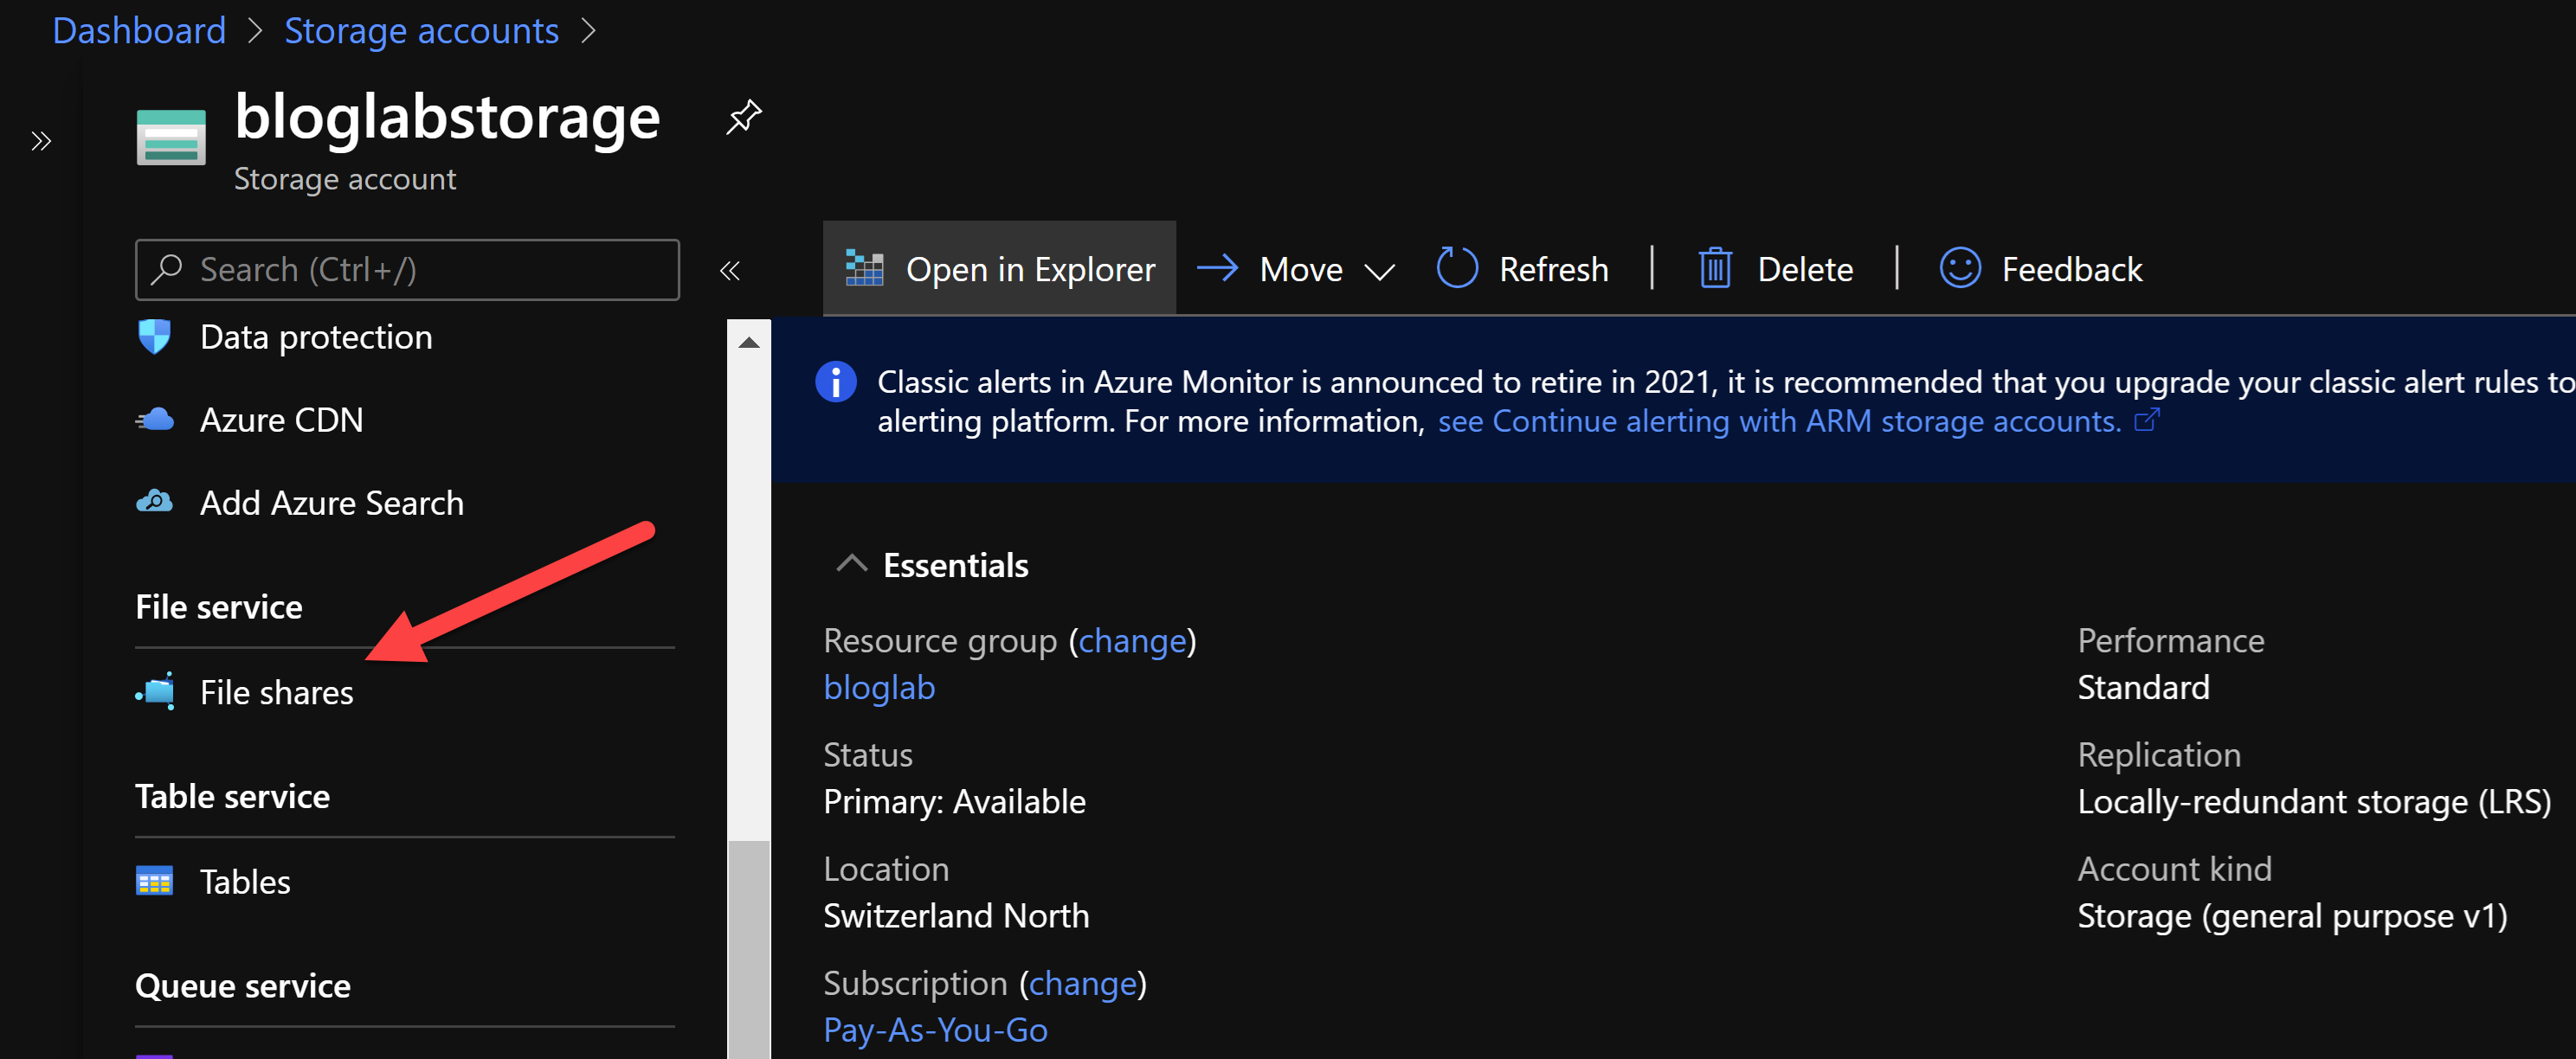
And add a File Share
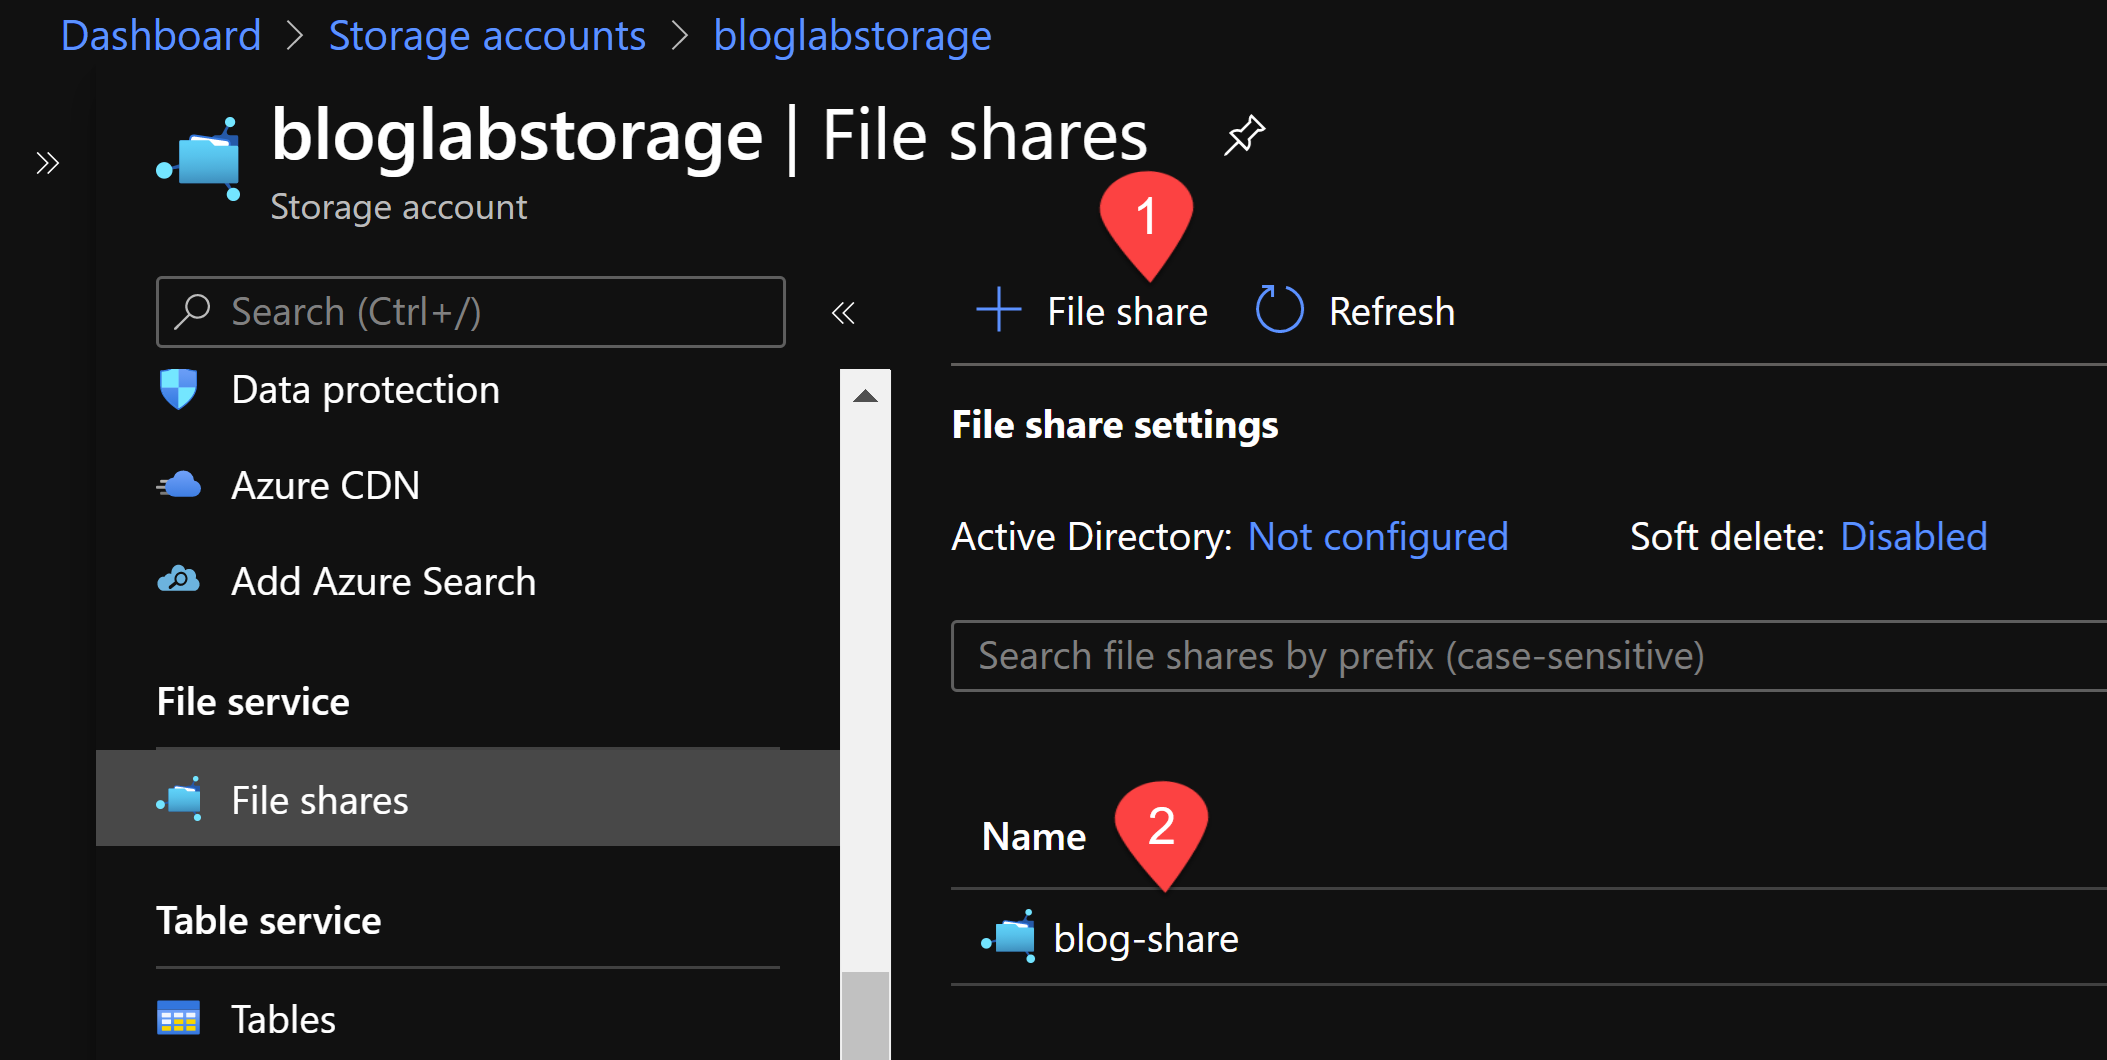
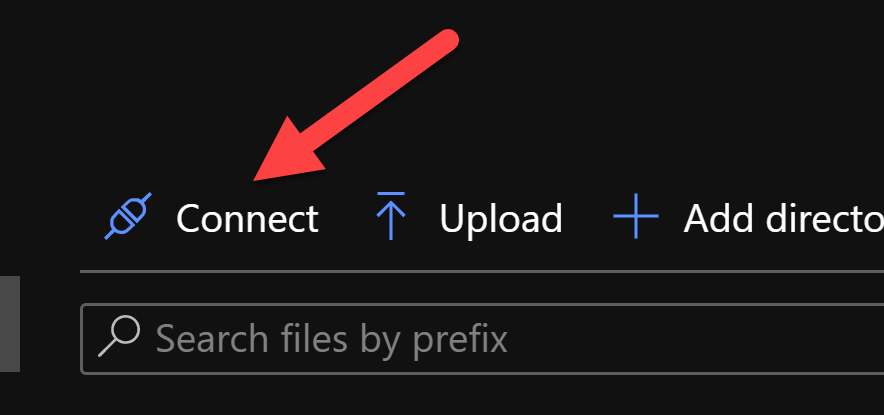
And click on the created file share next. In the next window, click on Connect which will open a side window. In here, you can define a mapping letter (eg. Z) and it shows a some code with which you can map your file store.
Copy this code (attention: this has a password in it, keep this secret). Paste this into PowerShell ISE or put it into a file and run it on your VM. As a result, you should see something like this:
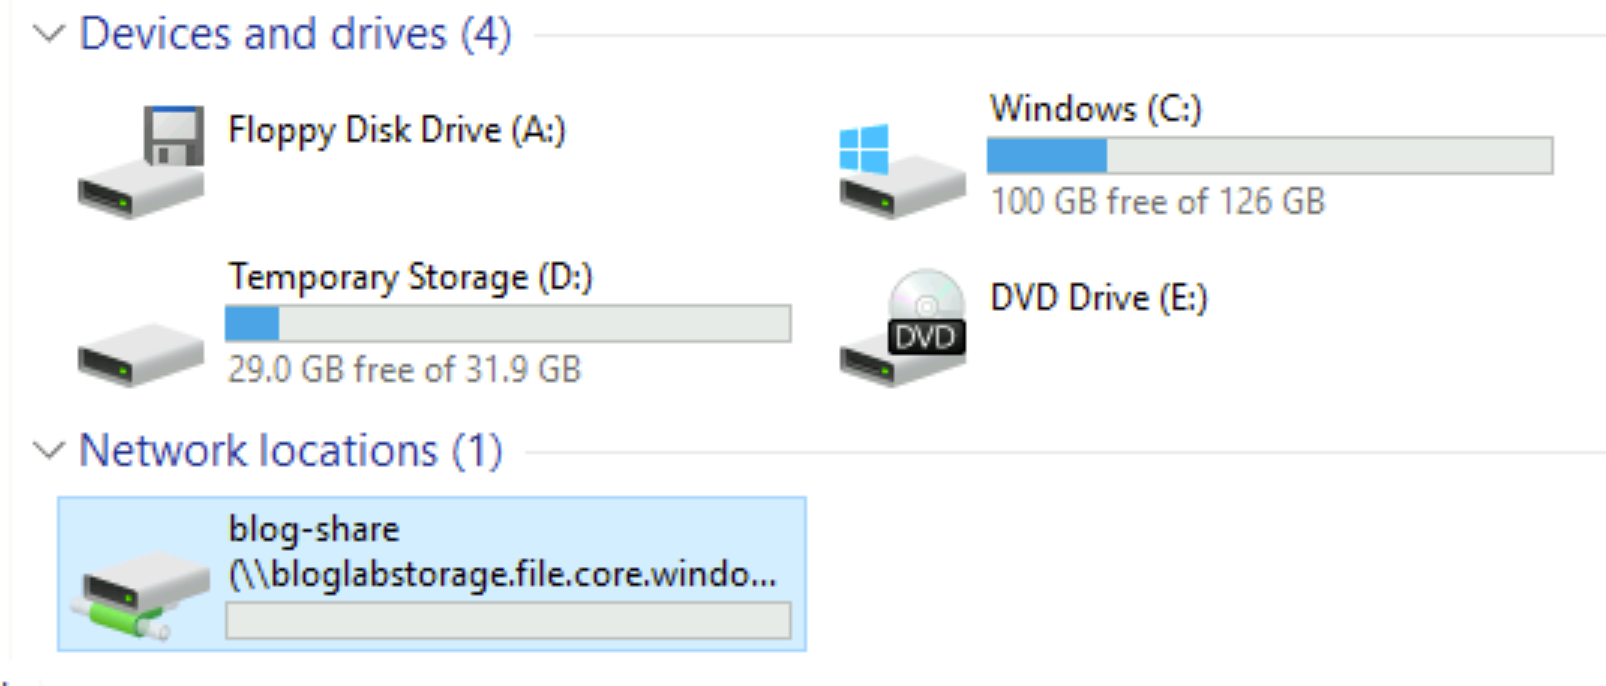
If you’ve uploaded a file via Microsoft Storage Explorer, you’ll see the file here. In order to restore this file or even more files, you can use the following code:
# Restore Parameters
$SQLBackupSource = "Z:\*.bak"
# Restore databases
Copy-Item $SQLBackupSource -Destination "C:\Program Files\Microsoft SQL Server\MSSQL15.MSSQLSERVER\MSSQL\Backup" -Force -Verbose
Restore-DbaDatabase -SqlInstance localhost -Path "C:\Program Files\Microsoft SQL Server\MSSQL15.MSSQLSERVER\MSSQL\Backup\"
In order to shut down your VM via Code or removing it or even deleting the entire resource group with all its objects in it, those few lines may help you out:
# For stopping this VM:
Stop-AzVM -Name $VMName -ResourceGroupName $ResourceGroupName

# # For removing this VM:
Remove-AzVM -ResourceGroupName $ResourceGroupName -Name $VMName

# For removing resource group (and all its objects, including this VM):
$ResourceGroupName = "bloglab"
Remove-AzResourceGroup -Name $ResourceGroupName -Force
This was just a small dive into this topic. Of course it would be possible to automatize this even more in a wholesome DevOps way. It also might be interesting to know that Microsoft offers some tools that may support this idea with:
If you have a question, feel free to contact me via LinkedIn!